Manage Custom Rules
|
In case of a OnPremise or Hybrid installation model -
|
|
Before creating a custom rule, make sure you have:
|
Create Custom Rule:
-
Click on
Rules→Show Templates Only→Create Custom Mule Rule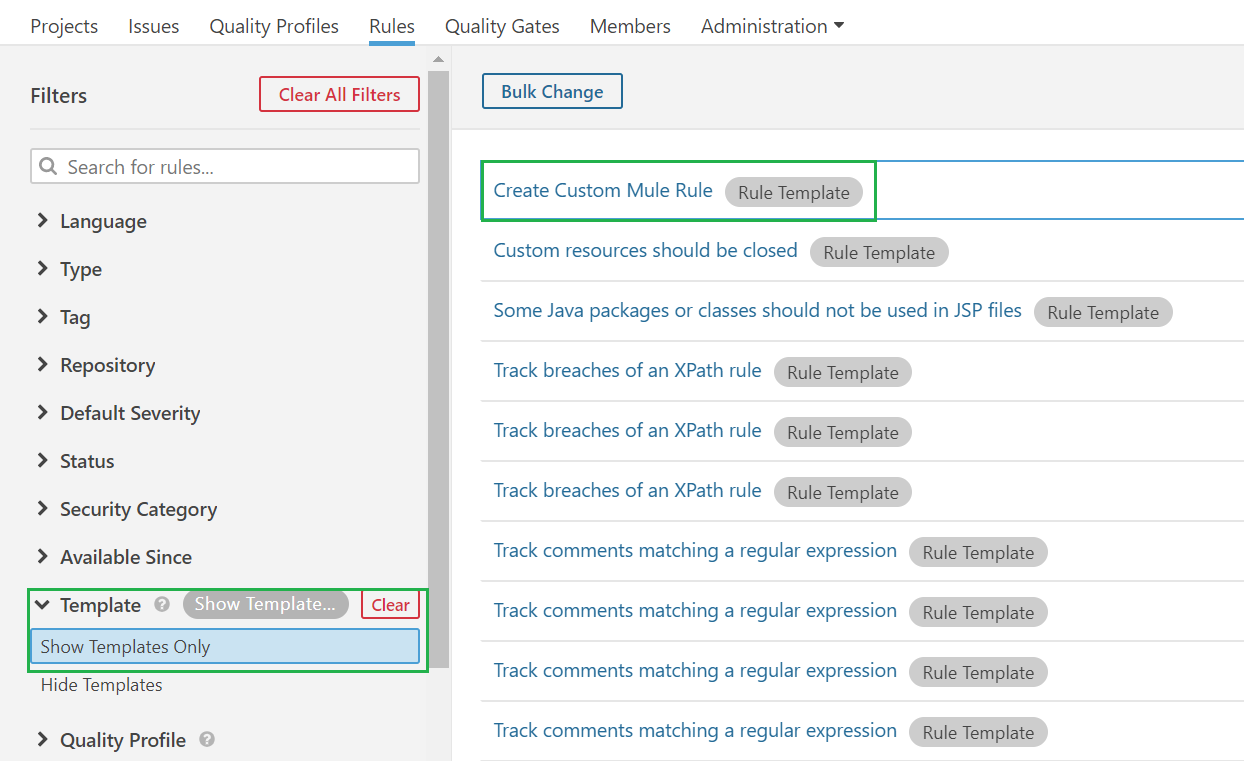
-
Registry Keywordsdetails the list of all available variables that can be used in the groovy script, while defining a custom rule -
Click on
Createto start defining a custom rule
-
Fill in all the required attributes. Refer Custom Rule Attributes for more information
-
Click on
Createto create the custom rule
Rules should be activated in atleast one of the custom Quality Profiles for it to be applied on the projects being scanned (usually the default Quality Profile).
Follow the below steps to activate the rule -
-
Select the custom rule created earlier
-
Click on
Activate
-
Select the
Quality Profilein which the rule should be activated and click onActivate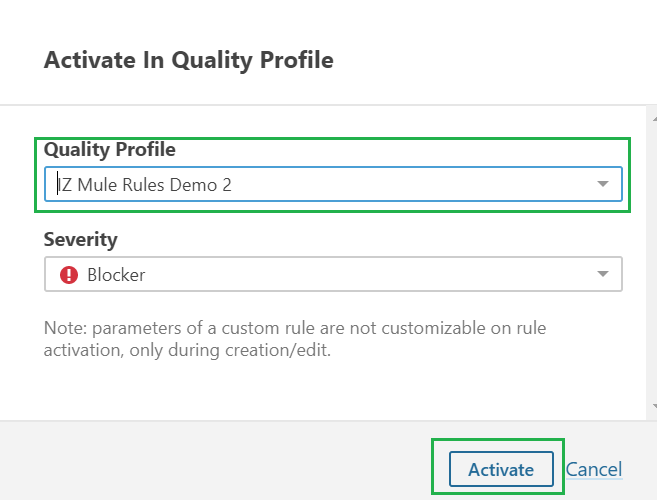
Custom Rule Attributes:
-
Name- Name of the new custom rule -
Key- Unique key for the custom rule. The key will be auto populated, which can be changed if there are any conflicts -
Type- Select the type of rule, which can be one of-
Code Smell
-
Bug
-
Vulnerability
-
Security Hotspot
-
-
Severity- Select the rule severity, which can be one of-
Blocker
-
Critical
-
Major
-
Minor
-
Info
-
-
Implementation- Actual groovy script for the rule definition -
Description- Description of the rule. Markdown syntax can be used to describe the rule. Few examples include -
| Write | To Display |
|---|---|
*this text is bold* |
this text is bold |
https://analyzer.integralzone.com/ |
|
[IZ Analyzer](https://analyzer.integralzone.com) |
Edit Custom Rule:
-
Click on
Rules→ Select languageMule→Search for rule name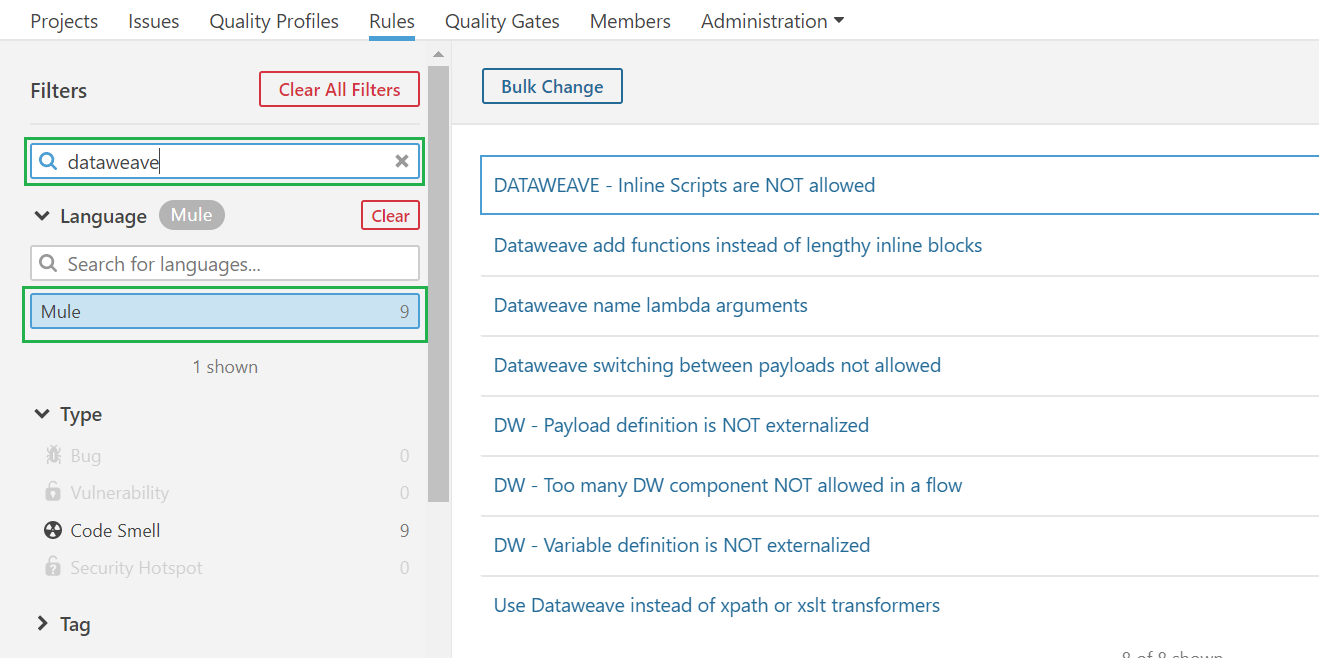
-
Select a rule to edit
-
Update the required fields and click on
Save. Refere Custom Rule Attributes for more information
See Also
-
For Activating custom rules - Activate Rules
-
For Deactivating custom rules - Deactivate Rules