IZ Scan Plugin - IZ Analyzer Configuration
|
Before installing the plugin, make sure you have:
|
Connection Setup
-
Go to
Window→Preferences→IZ Preferences(Anypoint Studio→Settings→IZ Preferencesin Mac)-
Choose
IZ Analyzerplugin type -
Provide the
Service Url. Service URL for cloud users will be https://analyzer.integralzone.com/ and for on-premise or hybrid installations, use your organization specific url. -
Login to the IZ Analyzer web application. Click on your Profile icon and navigate to
My Account. Select theSecuritytab and generate a new token by providing a token name. Use this generated token in tneAccess Tokenfield.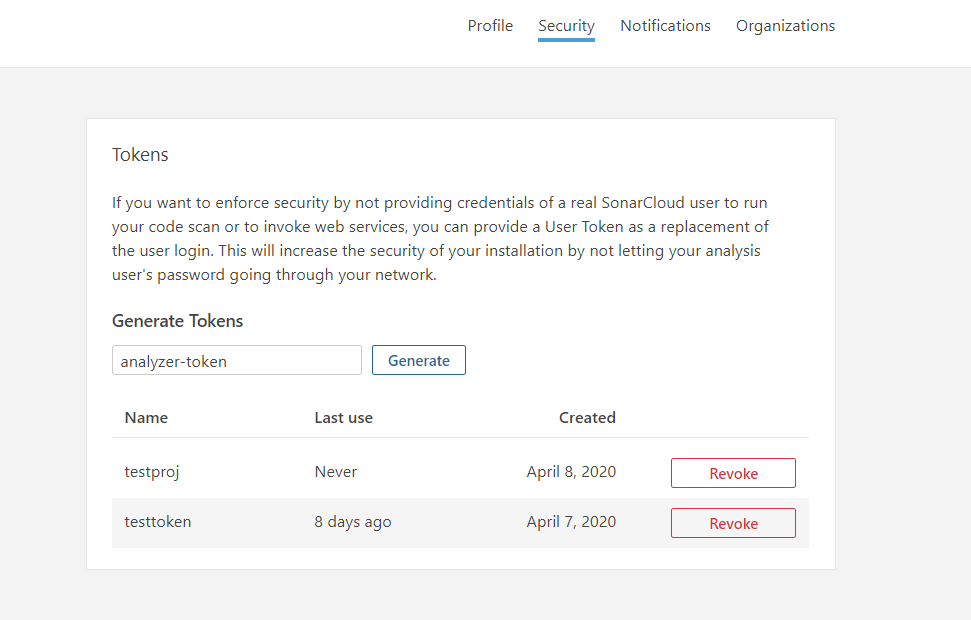
-
-
Use the
Developer Tokenshared as part of the license details -
Click on
Test Connectionto ensure connection is successful. -
Click on
Sync Metadatato sync the availableQuality Profilesand corresponding rules --
Quality Profiles→ Choose the required Quality Profile to sync the rules from server -
Choose the
Enable Clean Code Severityto display the Severities based on Clean Code Severity attributes (i.e. HIGH, MEDIUM, LOW). Ensure to click onSync Metadatabutton when this option is toggled. The subsequent scans will start displaying the updated Severities inOn The Fly Results.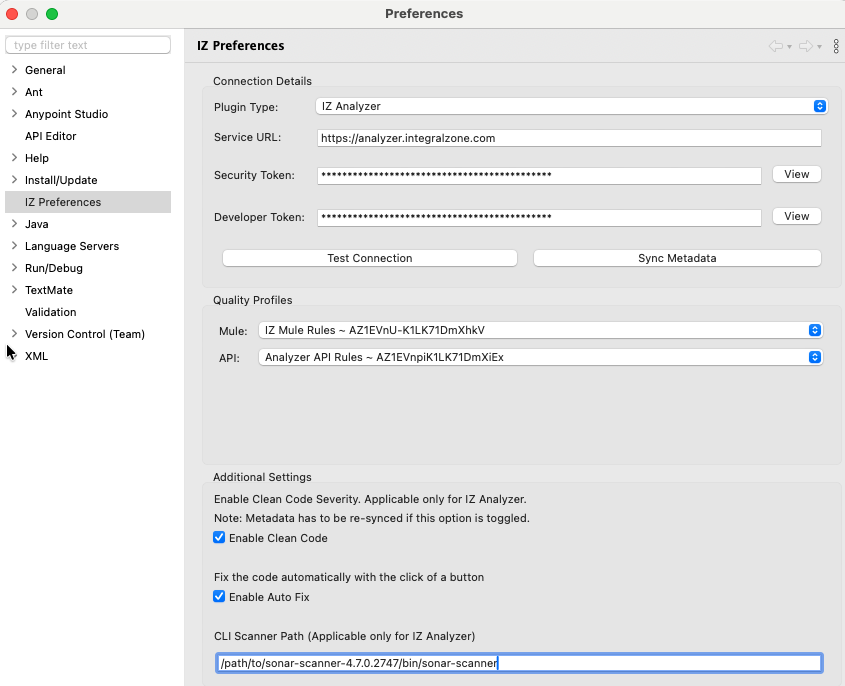
-
CLI Scanner Path→ Specify the path to the downloaded SonarScanner CLI. Provide the full path to the executable, which will be used to run the analysis and upload the project to the configured server. -
Choose
Applyand SelectApply and Close
-