STDIO MCP Server Configuration
The following section describes the steps required to configure the IZ STDIO MCP server in various IDEs.
Visual Studio Code
-
Open the preferences and search for MCP
-
Click on
Add Server→Command (stdio) -
Enter the command (Eg: npx) and name as
falcon-scan-mcp-server -
A mcp.json file with the entered details will be opened
-
Add the following arguments
accesstoken,*serverurl. -
To generate a token, refer token generation
-
The final configuration should look something like
"falcon-scan-mcp-server": {
    "command": "npx",
    "args": [
        "-y",
        "--registry=https://npm.integralzone.com",
        "falcon-scan-mcp",
        "--accesstoken",
        "<Token Generated from IZ Suite>",
        "--serverurl",
        "<http(s)://YOUR_HOST_NAME>"
    ],
    "type": "stdio"
}
Cursor IDE
-
Open the preferences and search for MCP
-
Click on
View: Open MCP Settings -
In the settings screen click on
New MCP Serverand add the below configuration:
    "falcon-scan-cli-mcp-server": {
        "command": "node",
        "args": [
            "-y",
            "--registry=https://npm.integralzone.com",
            "falcon-scan-mcp",
            "--accesstoken",
            "<Token Generated from IZ Suite>",
            "--serverurl",
            "<http(s)://YOUR_HOST_NAME>"
        ]
}-
To generate a token, refer token generation
-
Save the mcp.json file.
-
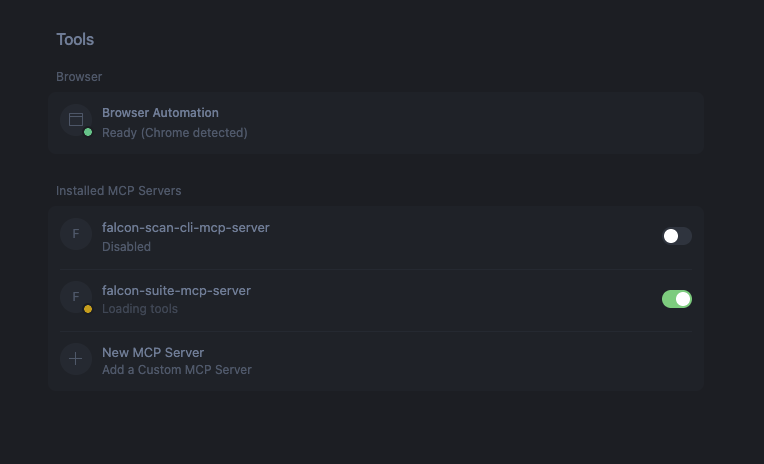
Navigate back to Cursor Settings tab and toggle the enable switch.
Claude Desktop
-
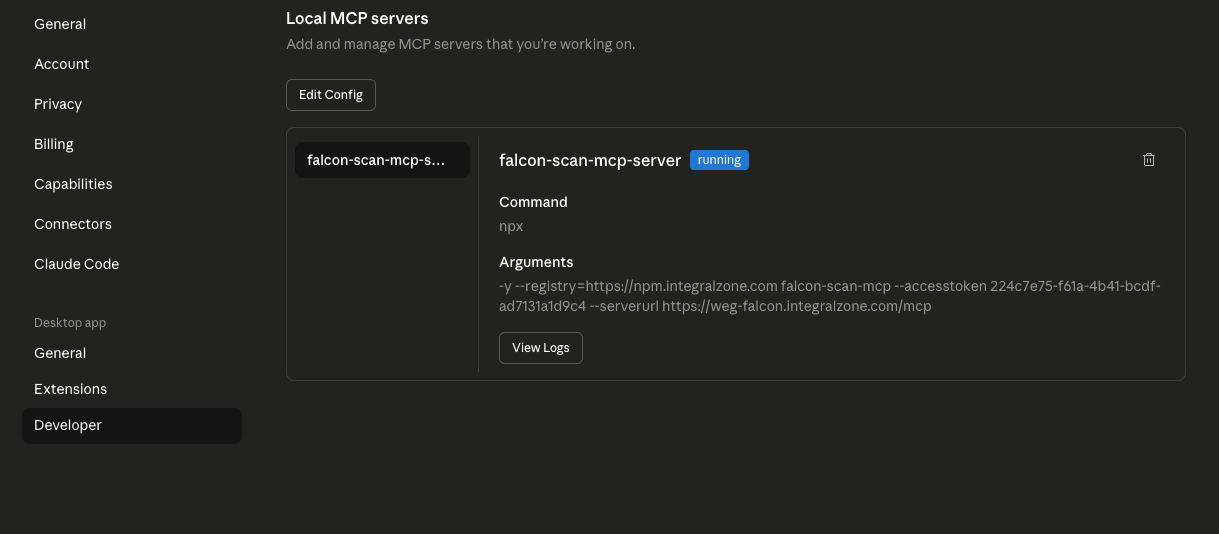
Navigate to
Settings→Developerand click on edit config. -
Edit the
claude_desktop_config.jsonfile and add the following contents undermcpServerstag:
    "falcon-scan-cli-mcp-server": {
        "command": "node",
        "args": [
            "-y",
            "--registry=https://npm.integralzone.com",
            "falcon-scan-mcp",
            "--accesstoken",
            "<Token Generated from IZ Suite>",
            "--serverurl",
            "<http(s)://YOUR_HOST_NAME>"
        ]
}-
To generate a token, refer token generation.
-
Save the
claude_desktop_config.jsonfile. -
Restart Claude Desktop
-
Navigate to
Settings→Developerand if every thing is configured correctly, the status should berunning.