Configure Endpoint
Configure Endpoint & Version
-
Navigate to
IZ Pulse→Endpointsand click onCreate Endpoint -
Enter the basic details which include -
-
Endpoint Name- Name of the endpoint -
System- Optional. If a system is selected, onlyAgentsassociated with the system can perform the health check -
Version- Version of the endpoint -
Visibility- Private or Public. Private endpoints will not be visible in Public Status Pages -
Status- Active or Disabled. Disabled endpoints will not be displayed in the status page -
Method- HTTP method. Eg: GET, POST ect -
Endpoint- Valid HTTP endpoint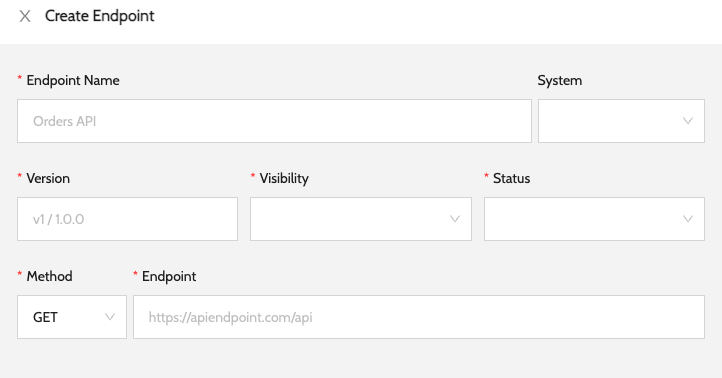
-
-
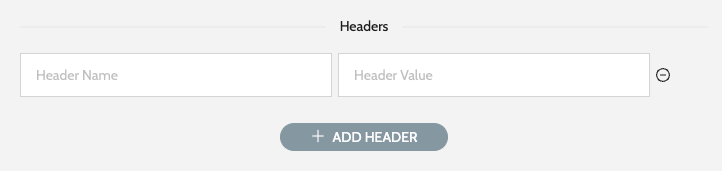
Add optional headers. These headers will be sent for every health check request
-
Add response assertion. Assertion status code will be validated against the actual response status code

-
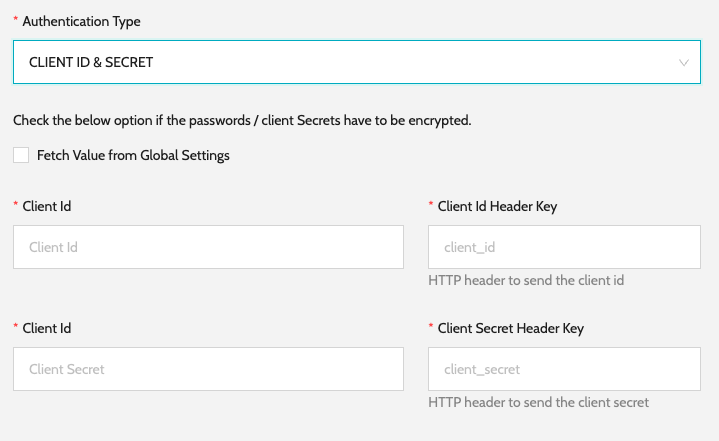
Authentication Type. Eg: None, Basic, Client Secret. More information can be found in the below section.

Configure Authentication
-
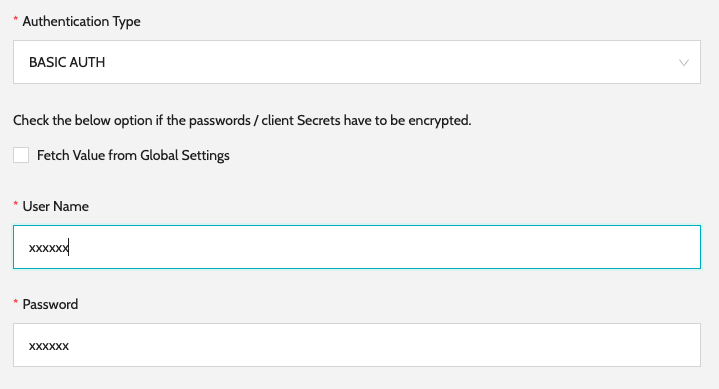
Basic Authentication
-
Configure the Username and Password required to connect to the API to perform the health check.
-
-
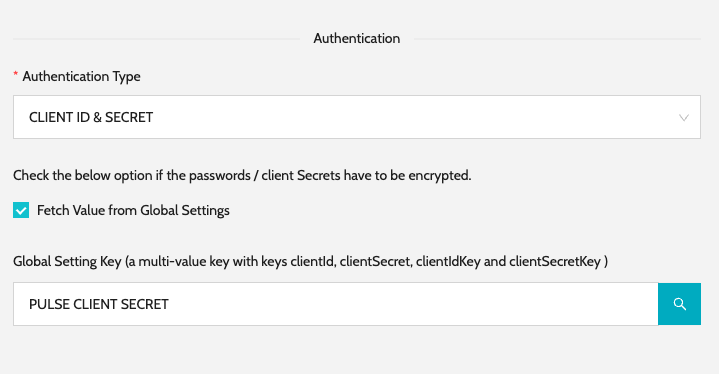
Client Id and Secret
-
Configure the Username and Password required to connect to the API to perform the health check.
-
Configure Authentication In Global Settings
-
This setting will be useful if the same set of credentials have to be used for authenticating multiple endpoints.
-
Below is an example of configuring Client Id and Secret in Global Setting and reusing it while configuring the endpoint.
-
Navigate to
Global Settings→Settingsand Click onConfigure Settings -
Configure the
Key, select type asMULTI VALUE, Filter Type asSETTING. Add required Key Value pairs using theAdd Entryoption.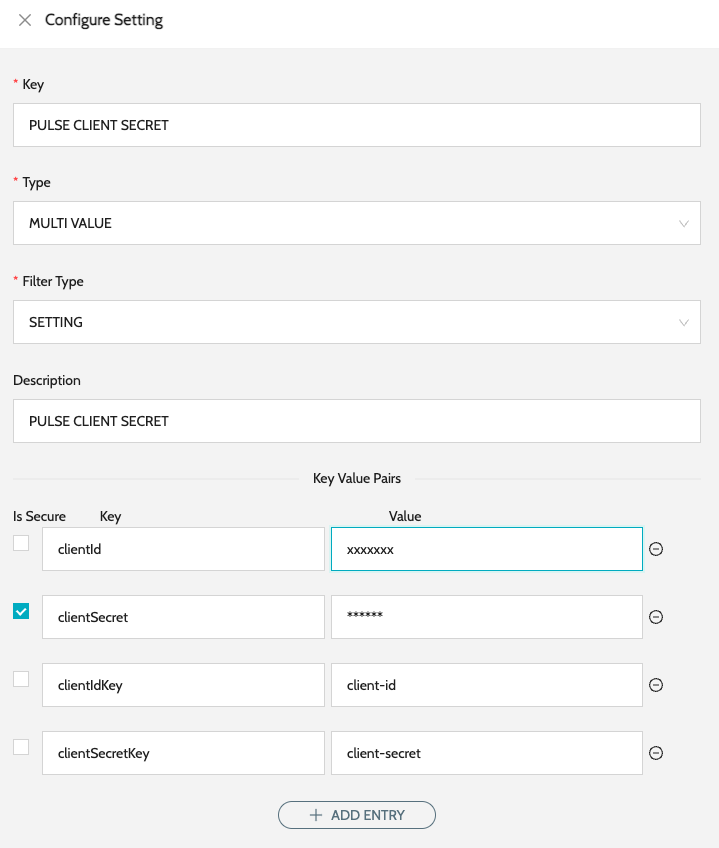
-
We can now use the new Setting identified by its key while configuring the endpoint.